LutKit· Start here Front page Get LutKit

Start here · Zero skills needed · iPhone 15 Pro and later

Your first Log clip, in about two minutes.

Shoot Apple Log with the camera you already have. Open the clip in LutKit. Slide one ruler. That is the whole lesson. Everything after it is taste.


A coastline straight off the iPhone in Apple Log: flat and grey
00:00 · As shot, Apple Log 2
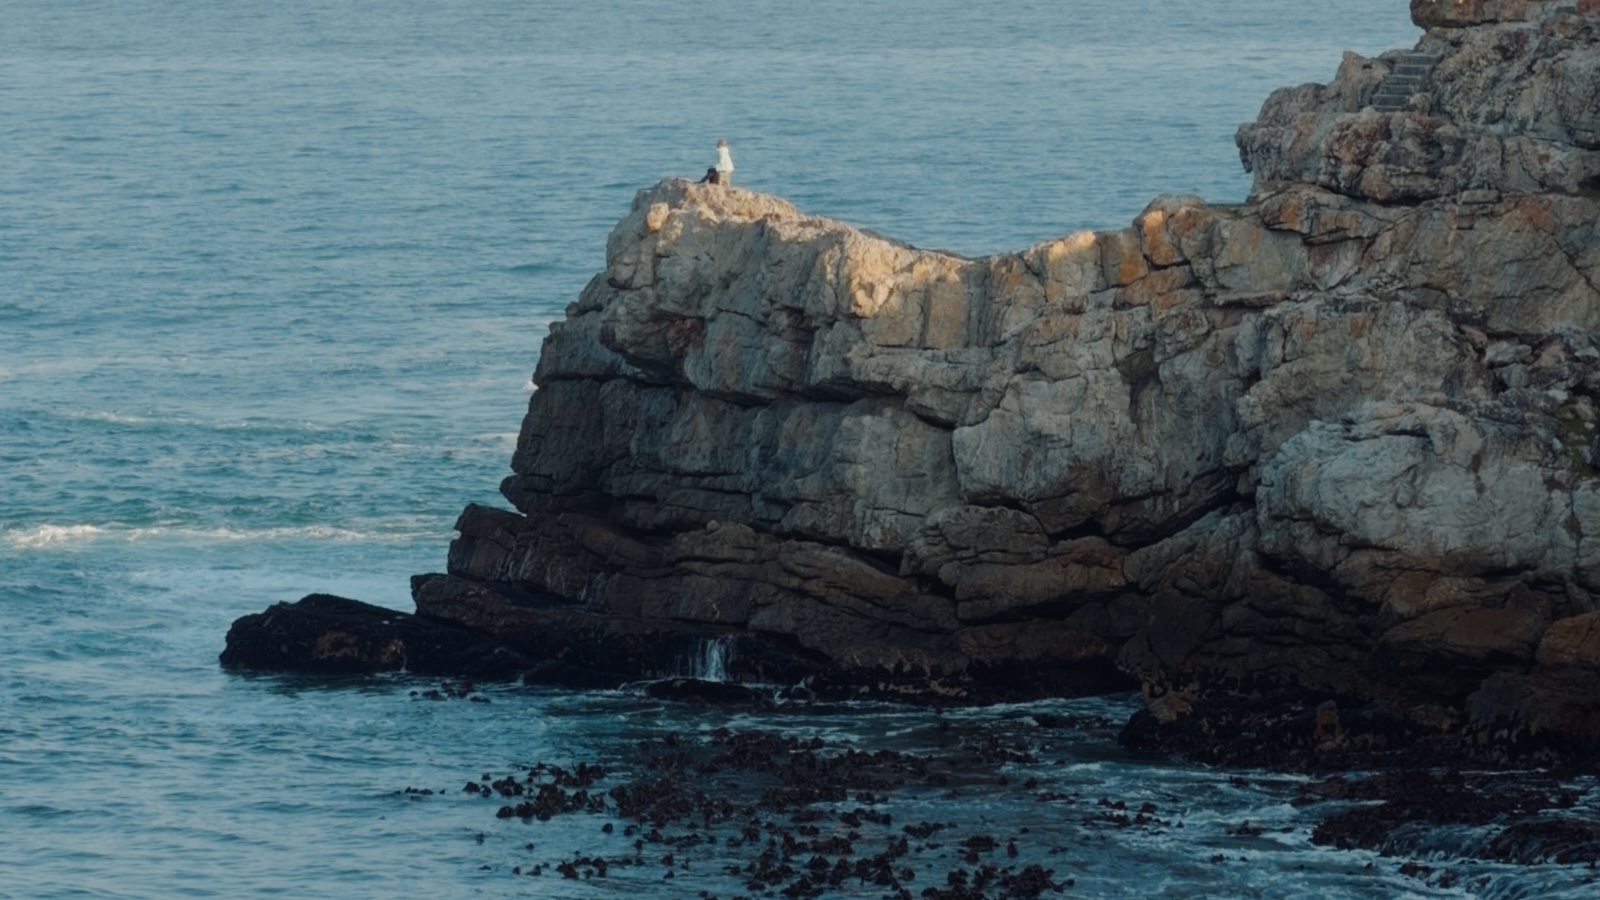
The same coastline after a LUT at 72 per cent
02:00 · Kodak 2383 at 72
00:00

Playhead · follows your scroll
00:00Shoot

Turn on Log. Then forget about it.

Log is the iPhone keeping everything the sensor saw. It looks flat and grey on the screen. That is correct. The colour comes back in the next step, and you get to choose how much.

It lives in Apple's own Camera app. By default it switches itself off when you leave Camera, so make it stick: Settings › Camera › Preserve Settings › Apple ProRes on. After that, Log is your default.

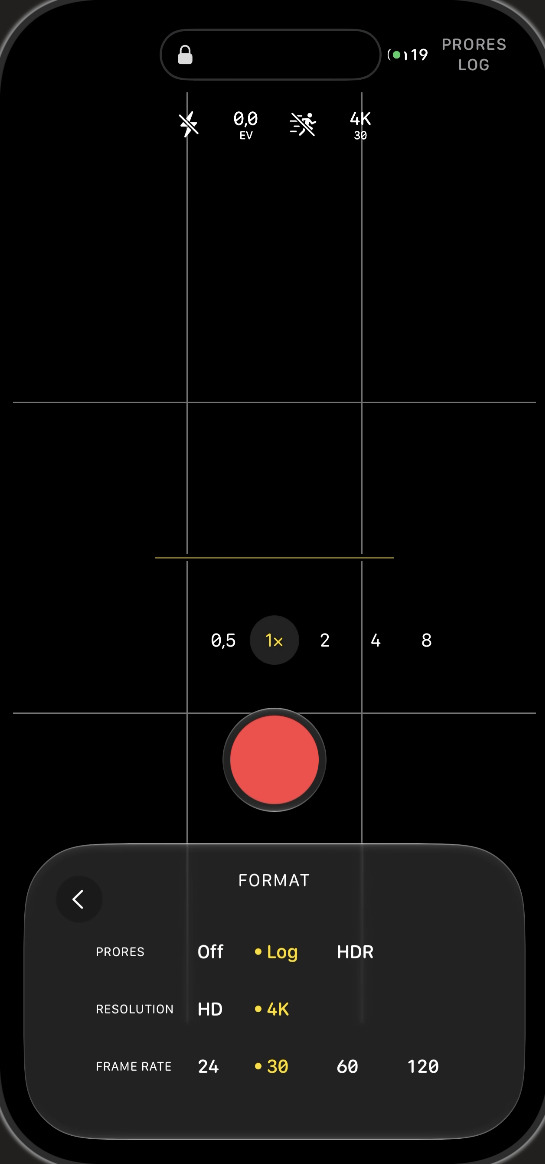
CameraVideo⋯FormatProRes · Log

The badge at the top reads ProRes Log while it is on. No badge, no Log. iPhone 17 Pro records Apple Log 2, older Pros record Apple Log, and LutKit reads both. If your Camera app looks different, the same switch is in Settings › Camera › Formats.

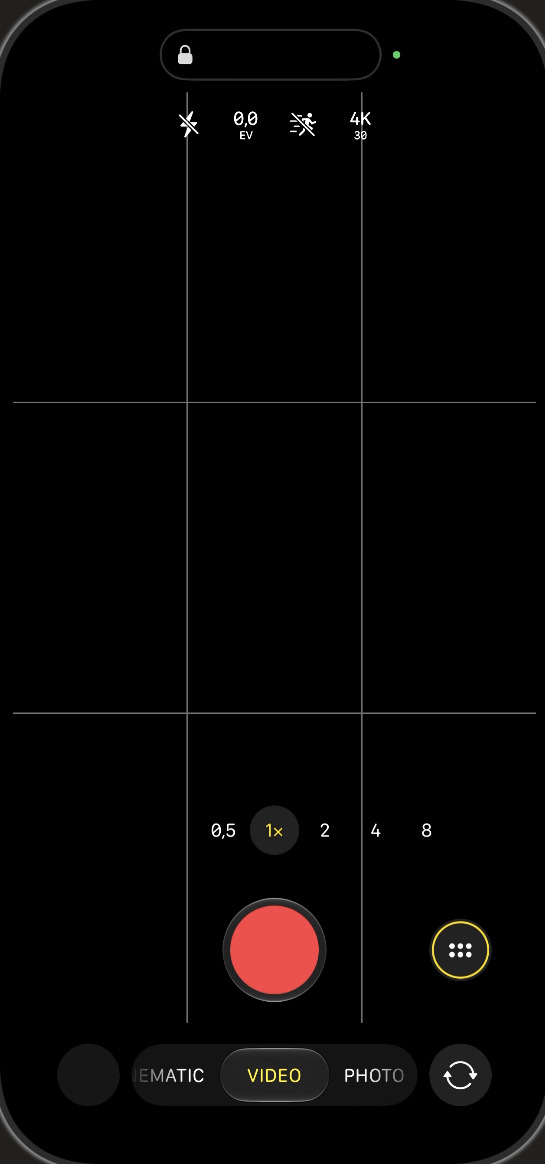
  1. Open Camera, swipe to Video.Tap the ⋯ button by the shutter, then Format. Set ProRes to Log, resolution to 4K, frame rate to 24 or 30. The picture goes flat. Good.
  2. Press and hold on your subject.That locks focus and exposure so nothing pumps mid shot. Slide the sun icon down a touch if the sky looks white. Log keeps the shadows; it never gives back a blown sky.
  3. Pick a lens before you press record.Try all of them. For the look people call cinematic, tap 2× or longer and step back. Why that works is the next step.
  4. Shoot ten seconds.Hold still, let something move through the frame. One short clip is all this lesson needs.
The Camera app in Video mode, mirrored from the phone
Camera · Video
The Camera app's Format panel: ProRes set to Log, 4K, 30 frames
⋯ · Format · ProRes Log · 4K

Set once, preserved

Apple LogiPhone 15 Pro and 16 Pro Apple Log 2iPhone 17 Pro 2× and upfor depth 4K 24 or 30ProRes

00:20Lens

1× is the least cinematic lens on the phone.

Every phone shoots at 24 mm. That is why phone footage looks like phone footage. Tap 2× and take three steps back until your subject is the same size again. The subject has not changed. The background has: it got bigger, closer and softer. That is the compression people read as cinema.

Try 2× first. Then 4× from across the room. Keep the subject the same size by walking, never by pinching. Your lens row may read 5× instead of 4×. Same idea.

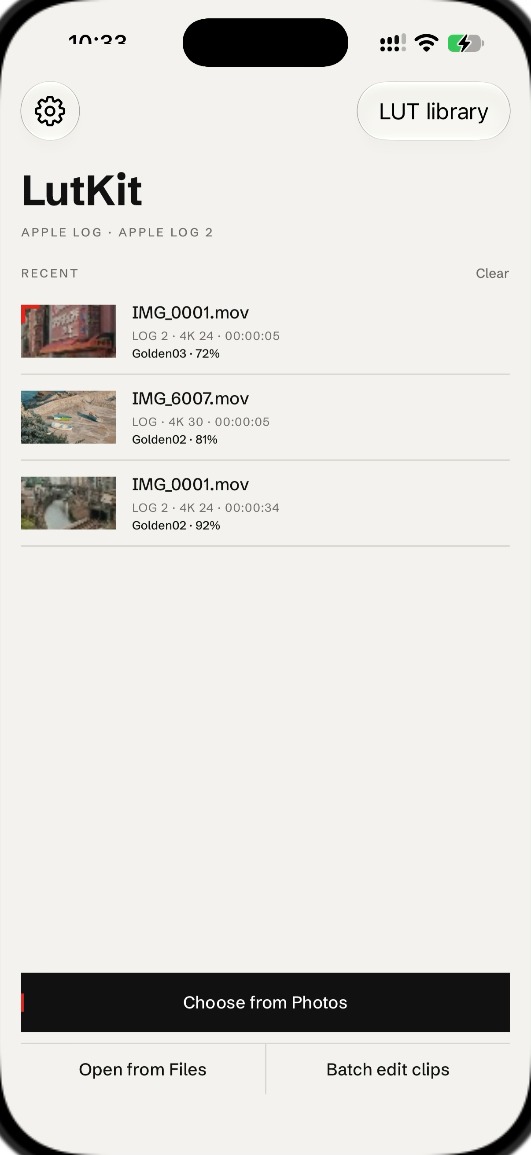
LutKit home: recent clips, and a Choose from Photos key

00:30Import

Open it in LutKit.

Tap Choose from Photos and pick the clip you just shot. LutKit reads off the file that it is Apple Log or Apple Log 2 and sets itself up. You never tell it what you shot.

The editor opens with the clip in the black well and no LUT applied. It still looks grey. Ten more seconds.

Choose from Photosthe fast path Open from FilesAirDrop, external SSD Nothing uploadsit all stays on the phone

00:40Look

Pick a LUT. Then take it down.

Tap any LUT in the strip and the colour snaps back. That is the moment. But a LUT arrives at 100, and 100 is almost never the look. It is the LUT shouting.

Drag the intensity ruler down until the skin looks like skin and the shadows still have something in them. For most LUTs that lands between 60 and 80. Where exactly is your taste, and it moves a little from LUT to LUT.

100 %

Intensity · drag it

IMG_6007 Apple Log 2 · 4K 24 Export
00:00:0300:00:10

LUT · Golden02

100 %
None KodakGo… Golden02 Golden03 Manage ›
LUT LIGHT COLOR HSL DETAIL GRAIN
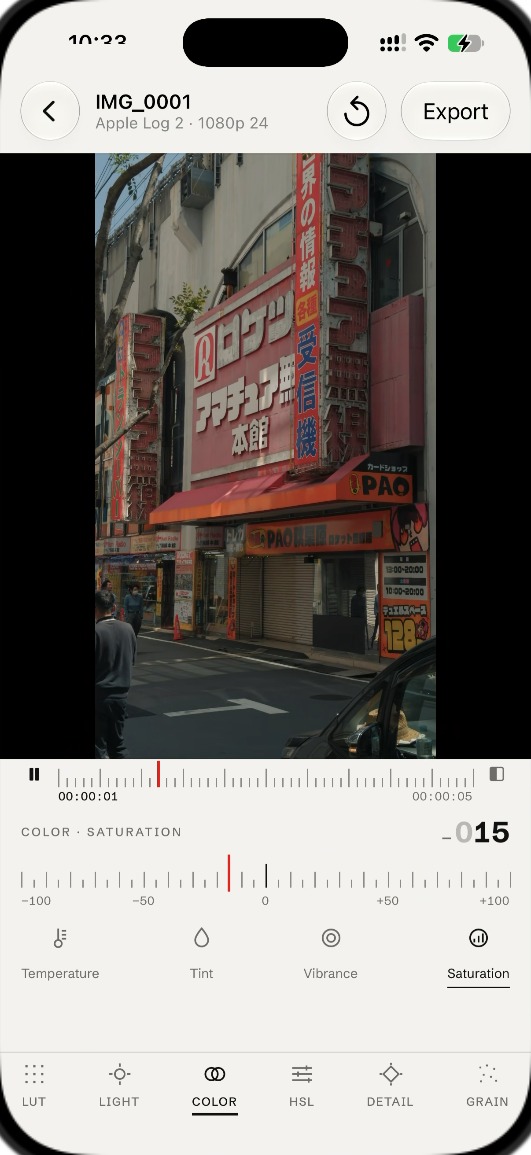
The Color tab: temperature, tint, vibrance and saturation on one ruler

01:10Light

Then fix the light, not the LUT.

A LUT sets the colour. It has no idea how bright your clip was. If the picture feels dark or washed out after the LUT, leave the LUT alone and open Light.

Nudge Exposure until faces sit where you want them. Add a little Contrast if it still feels flat. If the white balance was off, Color has Temperature and Tint on the same ruler. Small moves, one tick at a time. If you can see the adjustment, it is probably too much.

Lightexposure, contrast Colortemperature, tint, saturation One tickthen look again

01:30HSL · Optional

Going further: one colour at a time.

Skip this on day one. When you come back to it, HSL gives every colour its own three rulers: Hue, Saturation and Luminance. Pull the green of the grass down, push the orange in skin up, leave everything else alone.

It is how graded footage gets that quiet, controlled look where nothing fights for attention. Same rule as Light: one tick, look again.

  1. Skin is orange.If faces go muddy under a LUT, raise Orange luminance a touch. Do not touch its saturation first.
  2. Grass and trees are green.Most LUTs push green hard. Take Green saturation down until foliage stops glowing.
  3. Sky is blue and cyan.Lower Cyan luminance a little for a deeper sky without touching the rest of the frame.

01:40Grain

Grain, sparingly.

Phone footage is too clean. Cinema cameras are not. A whisper of fine grain breaks up that digital smoothness, and the eye reads the result as a bigger sensor and a more expensive camera.

Choose the finest grain, keep the amount low, and stop before you can see it in the sky at arm's length. If you notice the grain, back off one tick. The trick only works when nobody can point at it.

Finenever coarse Lowfelt, not seen Lastafter LUT and Light
A cliff shot, graded, with a hint of fine grain
Kodak 2383 at 72 · fine grain, low
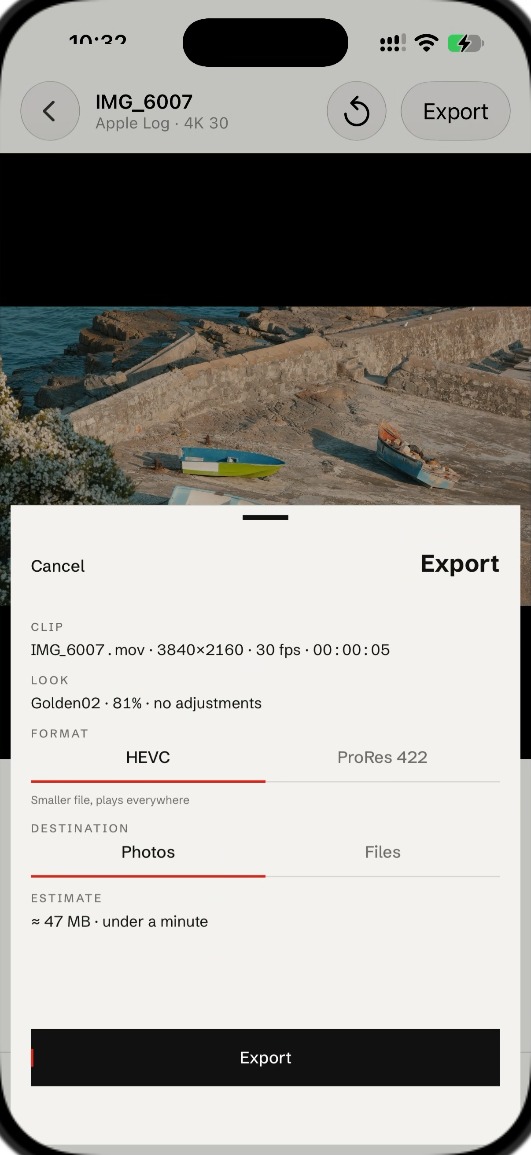
Export sheet: HEVC or ProRes 422, to Photos or Files

01:50Export

Export. Watch it back on the couch.

Tap Export. HEVC to Photos is the fast path and plays anywhere. Choose ProRes 422 to Files if you are handing the clip to an edit on the Mac.

Then open Photos and play it next to the original. That is the aha. Next time you shoot, LutKit remembers the look, and Batch applies it to a whole day of clips at once.

02:00The whole lesson

Screenshot this.

Eight lines. Everything above, in the order you do it.

  1. 00:00Camera · Video · ⋯ · Format · ProRes Log · Preserve Settings › Apple ProRes to keep it
  2. 00:104K · 24 or 30 · press and hold to lock focus and exposure
  3. 00:202× or longer, step back · depth comes from the lens
  4. 00:30LutKit · Choose from Photos
  5. 00:40Tap a LUT · drag intensity to 60–80
  6. 01:10Light · Exposure, Contrast · one tick at a time
  7. 01:40Grain · fine, low · felt, not seen
  8. 01:50Export · HEVC to Photos
LutKit · © 2026 hloo Front page · App Store